
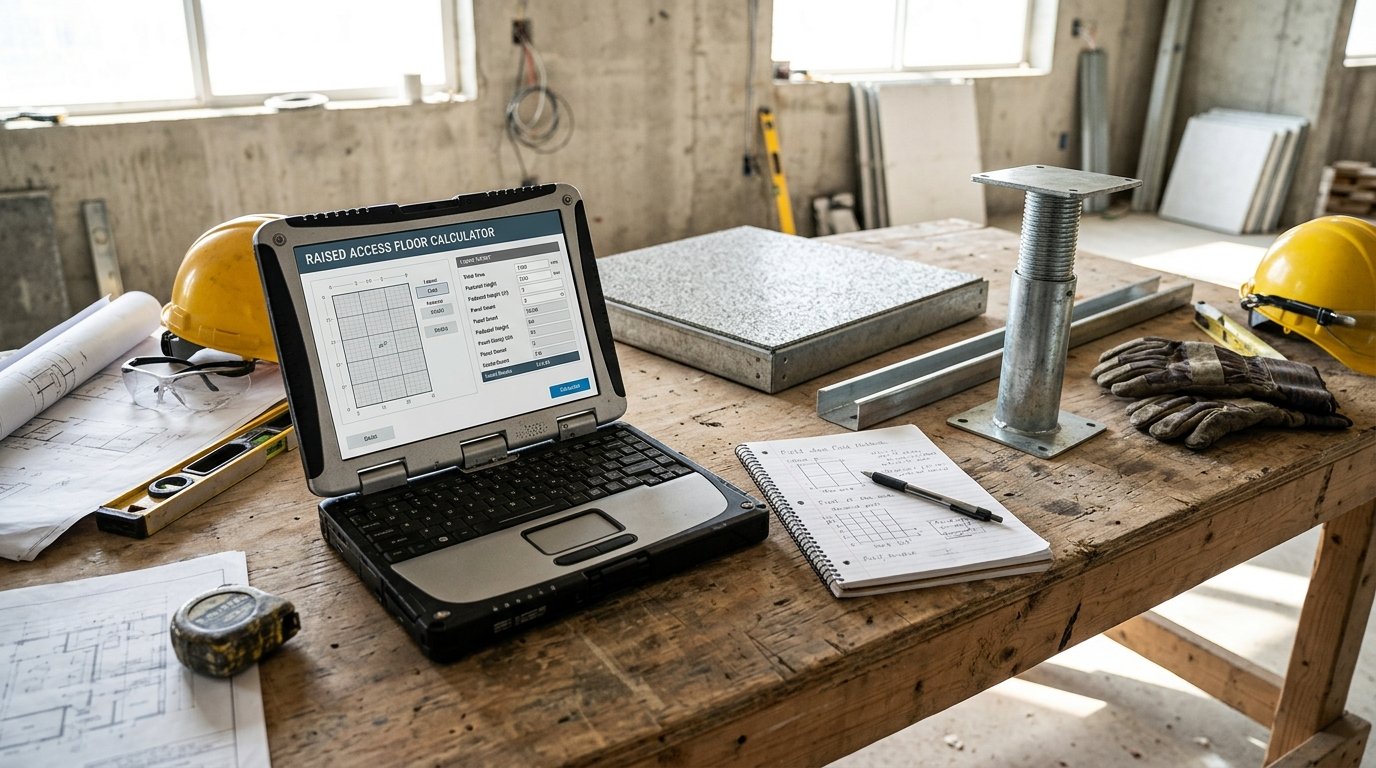
Raised Access Floor Calculator: Panels, Pedestals & Costs
A raised access floor is the invisible infrastructure of modern buildings. It hides every cable, every pipe, every duct — and it lets you move them without breaking concrete. Data centres, trading floors, laboratories, offices, and control rooms all rely on raised access floors because they are the only way to create flexible, serviceable, future-proof floor space. But unlike a normal floor, a raised access floor is a precision system: panels, pedestals, stringers, and fixings must all be specified as an integrated assembly, and the quantities must match the grid, not just the area.
Our Raised Access Floor Calculator is a free online tool that estimates the materials and costs of a raised access floor installation. It calculates the panel grid, panels with spare allowance, pedestals using the correct (n+1) × (m+1) formula, stringer length using the full grid geometry, panel mass by panel type, edge trim, floor covering, labour with type and height multipliers, delivery, VAT and total installed cost per m². It also flags when the floor void is too low for practical cable management, or too high for standard installation.
In this guide, we will show you how to use the calculator, explain each input and output, walk through four examples across common systems, and answer eight of the most frequently asked questions about raised access floors.
Raised Access Floor
Construction CalculatorRaised access floor: panels, pedestals, stringers, finish, spare panels and cost.
What is the Raised Access Floor Calculator?
The Raised Access Floor Calculator is a free online tool that estimates the quantity and cost of materials for a raised access floor installation. It supports:
- Panel sizes: 600 × 600 mm (standard) or 500 × 500 mm.
- Finished floor height: the void depth under the panels.
- Panel types: bare steel, laminate-faced, HPL-faced, vinyl-faced, wood-faced — each with a different mass and labour multiplier.
- Pedestal types: standard, heavy-duty, cornerlock.
- Stringers: yes or no.
- Floor covering: none, carpet tiles, vinyl tiles, or laminate.
- Spare panels: extra panels for future replacement.
- Edge trim: ramp or edge trim around the perimeter.
- Pricing: panel, pedestal, stringer, fixings, edge trim, finish, labour, delivery, VAT.
The output includes:
- Floor area
- Panel grid (rows × cols)
- Base panels and panels with spare allowance
- Pedestal count using the grid formula
- Stringer length using the full grid geometry
- Total panel mass in kg and tonnes
- Height check warning
- Itemised costs: panels, pedestals, stringers, fixings, edge trim, finish, labour, delivery
- VAT, grand total and cost per m²
The tool is part of a suite of flooring calculators available on our website. For related calculations, you can use our Epoxy Resin Floor Calculator, Liquid Floor Screed Calculator, Sports Wood Floor Calculator, and Bamboo Flooring Calculator.
Why Accurate Raised Access Floor Estimation Matters
A raised access floor is not like a tiled floor. Every panel, pedestal and stringer is part of a structural system, and each element must be ordered in the exact quantity required by the grid. Getting the quantities wrong is not just a cost problem — it is a rework problem that can delay the whole fit-out.
Panels Must Match the Grid, Not the Area
A raised access floor is a grid of square panels, and the number of panels is determined by how many whole panels fit across the room length and width — rounding up at every dimension. A room 7.9 m × 5.9 m with 600 mm panels needs 14 × 10 = 140 panels, not the 130 panels that area-based arithmetic suggests. Over a large floor, the difference between grid and area is hundreds of panels.
Pedestals Follow the Grid, Not the Panel Count
Every panel corner has a pedestal, but each pedestal is shared by up to four panels. The formula is not “1.05 pedestals per panel” — it is (n+1) × (m+1), where n and m are the number of panels along each dimension. For 140 panels arranged as 14 × 10, the pedestal count is 15 × 11 = 165. For a small 1 × 1 floor, it is 4 pedestals for 1 panel — 4× the naive estimate. The formula must be geometric, not proportional.
Stringers Are Calculated From the Grid
Stringers connect pedestals to create lateral stability. Their total length depends on the number of pedestals, not just on the panel count. The formula (2nm + n + m) × p_dim accounts for every segment along both axes of the grid. Using panels × 2 × p_dim under-orders by up to 10%, especially on larger floors where the perimeter contribution matters.
Panel Mass Matters on Upper Floors
A 600 × 600 mm bare steel panel weighs about 7 kg; HPL-faced panels about 9.5 kg; wood-faced about 10 kg. For a 200 m² floor at 555 panels, that is 3.9 tonnes of steel just in panels — before pedestals, stringers, or the raised void is accounted for. On upper floors, the mass must be checked against the structural design. The calculator outputs total panel mass in kg and tonnes for exactly this purpose.
Floor Height Determines Cable Management and Labour
The void depth under the panels dictates what can be routed. Below 100 mm, large cables and ducts cannot fit, and cable management becomes compromised. Above 1200 mm, structural considerations and access ramps or stairs become significant. The calculator warns when the height falls outside a practical range and applies a labour multiplier for taller floors.
Spare Panels Are Not Optional
Data centres, labs, and offices all need spare panels for future changes. A 2% spare allowance is standard — the alternative is to buy a single replacement panel at a premium months later. The calculator includes spare panels as a user-defined percentage.
Edge Trim and Ramps
Every raised access floor needs edge trim or ramps where it meets walls or adjacent floor finishes. For a room 8 × 6 m, that is 28 linear metres of trim — a small but real cost that is often forgotten.
VAT and Delivery
Raised access floor materials are heavy and bulky. Delivery and VAT add real cost to the final bill.
For more information on raised access floors, you can refer to Wikipedia’s article on raised floor or the PSA/CIS standards.
How to Use the Raised Access Floor Calculator
Using the calculator is straightforward. Here is a breakdown of each field.
1. Area
- Floor length: Enter the length in meters or feet.
- Floor width: Enter the width in meters or feet.
2. System
- Panel size: 600 × 600 mm (standard) or 500 × 500 mm.
- Finished floor height: The void under the panels. 300 mm is typical for offices; 600 mm or more for data centres.
3. Panel
- Panel type: Bare steel, laminate-faced, HPL-faced, vinyl-faced, or wood-faced. This determines panel mass and the labour multiplier.
- Spare panels: Percentage of extra panels for future replacement. 2% is typical.
4. Pedestal
- Pedestal type: Standard, heavy-duty, or cornerlock. This is for navigation — enter the price per pedestal in the pricing section.
- Stringers: Yes or no. Stringers add lateral stability and are common in high-spec floors.
5. Finish
- Floor covering: None (bare panels), carpet tiles, vinyl tiles, or laminate. The panel type determines what is pre-installed; the finish here is for panels that come bare and need an additional covering.
6. Accessories
- Ramp / edge trim length: Typically the perimeter of the room. 28 m for an 8 × 6 m room.
7. Pricing
Enter local prices for each component. Leave 0 to skip.
8. Extras
- Delivery / skip: Fixed cost for delivery and waste removal.
- VAT / tax rate: Applicable rate, or 0 if not applicable.
Once you enter all values, the calculator displays the full output, including grid, panel count, pedestals, stringer length, mass, height check, itemised costs, VAT and total.
Understanding the Calculations
To make the most of the calculator, it is important to understand each output and the underlying formulas.
Panel Grid
The grid is determined by how many panels fit along each dimension of the room:
rows = ceil(length / panel_dim)
cols = ceil(width / panel_dim)
For a room 7.9 m × 5.9 m with 600 mm panels:
- rows = ceil(7.9 / 0.6) = 14
- cols = ceil(5.9 / 0.6) = 10
- base_panels = 14 × 10 = 140
This is more accurate than area-based arithmetic because it reflects how panels are actually laid.
Panels with Spare
panels = ceil(base_panels × (1 + spare_pct / 100)).
For 2% spare on 140 panels: ceil(142.8) = 143.
Pedestals
pedestals = (rows + 1) × (cols + 1).
For 14 × 10: 15 × 11 = 165.
This is the correct formula: every panel corner needs a pedestal, and each corner is shared between up to four panels. The perimeter contributes the +1 in each direction.
Stringer Length
stringer_length = (2 × rows × cols + rows + cols) × panel_dim.
For 14 × 10 with 600 mm panels: (280 + 24) × 0.6 = 182.4 m.
Derivation:
- Horizontal segments: (cols + 1) rows × cols segments of length panel_dim = cols × (rows + 1) × panel_dim
- Vertical segments: (rows + 1) columns × rows segments of length panel_dim = rows × (cols + 1) × panel_dim
- Total: [cols × (rows + 1) + rows × (cols + 1)] × panel_dim = (2 × rows × cols + rows + cols) × panel_dim
Panel Mass
mass = panels × panel_kg.
Panel weights by type:
- Bare steel: 7 kg
- Laminate-faced: 9 kg
- HPL-faced: 9.5 kg
- Vinyl-faced: 9.5 kg
- Wood-faced: 10 kg
Height Check
- Below 100 mm: “Below 100 mm — cable management may be compromised”
- Above 1200 mm: “Above 1200 mm — check structural / access implications”
- Otherwise: “Height OK”
Labour
labour_cost = area × labour rate × panel multiplier × height multiplier.
Panel multipliers:
- Bare: 1.00
- Laminate: 1.05
- HPL: 1.05
- Vinyl: 1.08
- Wood: 1.10
Height multiplier: 1 + max(0, height − 0.30) × 0.20.
For a 0.60 m floor: 1 + 0.30 × 0.20 = 1.06.
Costs
Each item = quantity × unit price.
VAT and Total
VAT = subtotal × VAT / 100.
Total = subtotal + VAT.
Cost per m² = total / area.
Understanding these components helps you interpret the results and adjust your order. For more information on raised access floor standards, you can refer to Wikipedia’s article on raised floor or the PSA/CIS standards.
Reference Table of Panel Weights
| Panel type | Weight per 600×600 panel |
|---|---|
| Bare steel | 7.0 kg |
| Laminate-faced | 9.0 kg |
| HPL-faced | 9.5 kg |
| Vinyl-faced | 9.5 kg |
| Wood-faced | 10.0 kg |
Example Calculations
Let’s run through four examples across common systems.
Example 1: Small Office, 8 m × 6 m, 600 × 600 Bare Panels
Inputs:
- Length: 8 m, width: 6 m → 48 m²
- Panel size: 600 × 600 mm
- Height: 0.30 m
- Panel type: Bare steel
- Spare panels: 2%
- Stringers: Yes
- Finish: Carpet tiles at $14/m²
- Edge trim: 28 m
- Prices: panel $18, pedestal $6, stringer $4/m, fixings $2/m², edge trim $12/m, labour $25/m²
- Delivery: $200
- VAT: 20%
Calculations:
- Area = 48 m²
- rows = ceil(8/0.6) = 14; cols = ceil(6/0.6) = 10
- Base panels = 140
- Panels with 2% spare = ceil(140 × 1.02) = 143
- Pedestals = 15 × 11 = 165
- Stringer length = (2 × 140 + 24) × 0.6 = 304 × 0.6 = 182.4 m
- Panel mass = 143 × 7 = 1001 kg (1.001 t)
- Panel cost = 143 × $18 = $2,574
- Pedestal cost = 165 × $6 = $990
- Stringer cost = 182.4 × $4 = $729.60
- Fixings = 48 × $2 = $96
- Edge trim = 28 × $12 = $336
- Finish = 48 × $14 = $672
- Labour = 48 × $25 × 1.00 × 1.00 = $1,200
- Delivery = $200
- Subtotal = $6,797.60
- VAT = $1,359.52
- Total = $8,157.12
- Cost per m² = $169.94
Example 2: Data Centre Hall, 20 m × 15 m, Heavy-Duty Panels
Inputs:
- Length: 20 m, width: 15 m → 300 m²
- Panel size: 600 × 600 mm
- Height: 0.60 m
- Panel type: HPL-faced
- Spare panels: 3%
- Stringers: Yes
- Finish: None (HPL pre-finished)
- Edge trim: 70 m
- Prices: panel $45, pedestal $12 (heavy-duty), stringer $6/m, fixings $3/m², edge trim $18/m, labour $30/m²
- Delivery: $600
- VAT: 20%
Calculations:
- Area = 300 m²
- rows = ceil(20/0.6) = 34; cols = ceil(15/0.6) = 25
- Base panels = 850
- Panels with 3% spare = ceil(850 × 1.03) = 876
- Pedestals = 35 × 26 = 910
- Stringer length = (2 × 850 + 34 + 25) × 0.6 = 1759 × 0.6 = 1055.4 m
- Panel mass = 876 × 9.5 = 8,322 kg (8.32 t)
- Panel cost = 876 × $45 = $39,420
- Pedestal cost = 910 × $12 = $10,920
- Stringer cost = 1055.4 × $6 = $6,332.40
- Fixings = 300 × $3 = $900
- Edge trim = 70 × $18 = $1,260
- Finish = $0
- Labour = 300 × $30 × 1.05 × 1.06 = $10,017
- Delivery = $600
- Subtotal = $69,449.40
- VAT = $13,889.88
- Total = $83,339.28
- Cost per m² = $277.80
Example 3: Lab Floor, 12 m × 8 m, 500 × 500 Vinyl-Faced
Inputs:
- Length: 12 m, width: 8 m → 96 m²
- Panel size: 500 × 500 mm
- Height: 0.40 m
- Panel type: Vinyl-faced
- Spare panels: 2%
- Stringers: No
- Finish: None (pre-finished)
- Edge trim: 40 m
- Prices: panel $38, pedestal $7, fixings $2/m², edge trim $14/m, labour $28/m²
- Delivery: $300
- VAT: 20%
Calculations:
- Area = 96 m²
- rows = ceil(12/0.5) = 24; cols = ceil(8/0.5) = 16
- Base panels = 384
- Panels with 2% spare = ceil(384 × 1.02) = 392
- Pedestals = 25 × 17 = 425
- Stringer length = 0 (no stringers)
- Panel mass = 392 × 9.5 = 3,724 kg (3.72 t)
- Panel cost = 392 × $38 = $14,896
- Pedestal cost = 425 × $7 = $2,975
- Stringer cost = $0
- Fixings = 96 × $2 = $192
- Edge trim = 40 × $14 = $560
- Finish = $0
- Labour = 96 × $28 × 1.08 × 1.02 = $2,961.66
- Delivery = $300
- Subtotal = $21,884.66
- VAT = $4,376.93
- Total = $26,261.59
- Cost per m² = $273.56
Example 4: Height Warning Case
Same as Example 1, but with height entered as 0.08 m:
- Warning appears: “Below 100 mm — cable management may be compromised”
- Labour multiplier drops to 1.00 (since height < 0.30 m)
- User sees a cheaper total but a clear warning that the design has a practical problem
The calculator catches a design issue that would otherwise surface during the fit-out.
Benefits of Using the Raised Access Floor Calculator
Tips for Accurate Raised Access Floor Estimation
- Measure to the millimeter. The grid formula rounds up; small errors matter.
- Confirm the panel size. 600 × 600 mm is standard for most office and data centre floors; 500 × 500 mm is used for smaller rooms and retrofits.
- Choose the panel type for the floor’s use. Bare steel panels are cheapest and most durable; HPL-faced and vinyl-faced panels come pre-finished for clean environments; wood-faced panels are used in offices and showrooms.
- Do not skip stringers on high-traffic floors. Stringers add lateral stability and are worth the extra cost.
- Order spare panels. 2% minimum; 3% for data centres where future changes are likely.
- Check the void height. Below 100 mm, cable management is compromised; above 1200 mm, ramps and stairs become significant.
- Plan for edge trim or ramps. Every exposed edge needs a ramp or trim.
- Confirm the finish. Pre-finished panels have no additional finish cost; bare panels need a covering.
- Check the mass on upper floors. Panel mass × panel count can exceed 8 tonnes on a large floor.
- Do not forget delivery. Panels and pedestals are heavy — delivery is often significant.
- Check VAT. 20% VAT in the UK significantly changes the total.
- Verify with a specialist. Raised access floor installation is a specialist trade — for commercial projects, have a PSA-registered contractor verify the design.
For more information on raised access floor standards, you can refer to Wikipedia’s article on raised floor or the PSA/CIS standards.
Common Mistakes to Avoid
- Using area-based panel count. Under-orders for rooms that are not exact multiples of the panel size.
- Using a proportional pedestal count. Wrong formula — pedestals scale with grid corners, not panel count.
- Using a simplified stringer length. Under-orders by up to 10%.
- Forgetting spare panels. Buying one replacement panel at a premium months later is expensive.
- Ignoring panel mass. Large floors weigh tonnes — structural checks are essential.
- Skipping edge trim. Every exposed edge needs a ramp or trim.
- Ordering bare panels without a finish. They need a covering, which is a separate cost.
- Using the wrong height. Less than 100 mm or more than 1200 mm changes what can be routed and how the floor is accessed.
- No delivery allowance. Panels and pedestals are heavy — delivery charges are real.
- No VAT. 20% VAT significantly changes the total bill.
How to Reduce Raised Access Floor Costs
If your estimate is higher than expected, here are ways to reduce costs without compromising quality:
- Choose bare steel panels over faced panels. Cheaper upfront, but requires a finish.
- Choose 600 × 600 mm over 500 × 500 mm. Fewer panels for the same area.
- Skip stringers on low-traffic floors. Check structural requirements first.
- Reduce spare panels to 2%. Still enough for future replacement.
- Choose fewer, larger rooms. Perimeter effects (edge trim, stringers) reduce per m².
- Do the finish yourself. Carpet tiles and vinyl tiles are within reach of a competent DIYer.
- Compare suppliers. Raised access floor prices vary significantly.
- Time the project off-season. Contractors sometimes offer better rates.
- Get multiple quotes. Compare at least three PSA-registered installers.
- Verify VAT treatment. Check local rules for industrial applications.
Frequently Asked Questions (FAQ)
Conclusion
The Raised Access Floor Calculator is an essential tool for contractors, fit-out specifiers, facilities managers, and data centre engineers. It calculates panel grid, panels with spare allowance, pedestals using the correct grid formula, stringer length from full geometry, panel mass by type, height check, itemised costs, VAT and cost per m² — all with formulas that match how a raised access floor is actually built, not how it might look on a simple area estimate.
Whether you are installing a small office floor or a large data centre hall, accurate estimation of raised access floor materials is the foundation of a compliant, serviceable, and cost-effective installation. Try the Raised Access Floor Calculator today and take the guesswork out of your raised floor project.





3 Comments